Category Archives: Activities

How To Plan A Group Vacation

Blog
friends talking about how to plan a group vacation


It could be one of the best vacations you ever had, unless you don’t know how to plan a group vacation. Whether it’s family, friends, business colleagues, a large group or smaller groups, the first thing you have to be prepared for is to accommodate everyone as best you can. And if any of the plans are too far off what some of your guests have anticipated, well, you may need to do some scrambling.

We’re not saying this to scare you off, but to underline the importance of properly planning a group trip.

6 Tips for Planning a Group Trip

The first tip is to start planning as soon as possible, if not sooner! Planning for group travel isn’t the same as planning for travelling on your own, so the more time you have to plan, the more successful your trip will be.

  1. Have a Point Person – First, group travel could be everyone travelling on the same schedule and staying at the same places, or everyone booking their own flights and accommodations and meeting at the destination(s). In either case, it helps to have one or two people who are either responsible for executing the planning or at least being aware of everyone’s plans.
  2. Set a Budget – If you’re travelling together, travel and accommodation costs can vary widely. Make sure you get all the group members to agree on budget parameters for whatever the point people are booking on their behalf. To keep costs to a minimum in any case, ask hotels or vacation rentals about their group discounts.
  3. Book Flights Sooner Than Later – If you want to travel together, flights can fill up quickly leaving no room for all or part of a group of people.
  4. Look for Alternative Accommodations – Instead of individual hotel rooms, which can be costly, are there accommodations, like a large chalet, where everyone can stay together, but still have privacy? And if you’re still looking for a group travel destination, check out our Blue Mountain chalets for rent.
  5. Plan a Welcome Event – Traveling can be stressful and it’s always nice to arrange an event for everyone to meet up and start the vacation together.
  6. Pre-Plan Some Activities – Whether or not you’re travelling together or independently, have some group activities planned that can be optionally enjoyed by anyone and everyone.

If you enjoyed this post, check out our recent article about hiking near Toronto.

Blue Mountain, Ontario: Summer Activities

Blog
Hiking is one of blue mountain ontario summer activities

Summer’s here and that means it’s time to check out all the summer activities you can enjoy in Blue Mountain, Ontario. Whether you want to laze on a beach, or climb a sheer wall. Blue Mountain is as much a summer place as it is a ski resort with fun outdoor activities for all ages all season long.

4 Summer Activities in Blue Mountain

You’ll never have to wonder about what to do in Blue Mountain with this list of the local summer activities.

  • Go to the Beach – Did we mention the beach already?! Just 10 minutes from the Mountain, on the shores of Georgian Bay, you can enjoy warm waters and sandy beaches. Even if swimming and lying on the beach aren’t your thing, there are boat and jet ski rentals, or you can take a boat tour of historic Collingwood Harbour. There are lots of local eateries nearby for lunch and dinner.
  • Visit Blue Mountain Village – There are so many activities in The Village, you won’t want to leave. You can start by taking an open-air gondola ride up the Mountain, master the Segway and go for a trail ride, then take a ridge runner mountain coaster ride back down again.

    Even if none of that appeals to you, how about rock climbing, free-falling in a bag jump, mini-golf, mountain biking on groomed trails or paddle boating on Mill Pond?
  • Get Hiking – We think Blue should be just as famous for its hiking as it is for winter skiing. Not only can you traverse the Niagara Escarpment, but you can venture right into it by adding a little caving to your hike.
  • Take a Hummer Tour – If motorized “hiking” is more to your liking, hop into the back of one of these beasts and go where you thought no vehicle would dare to go.

If you enjoyed this post, check out our recent article “Hiking Near Toronto: The Best Trails in Blue Mountain”.

Learn How To Snowboard For Beginners

Blog
Stay at Blue Mountain shares tips on how to snowboard for beginners

So you want to know how to snowboard for beginners, eh? The first thing to wrap your head around is that it’s not easy. Even if you’re an OK skier, learning to snowboard can be a challenge. But the cool thing is that, once you get over that initial hump, you’ve got one more thing to do in Blue Mountain when you visit.

Before You Start to Learn How to Snowboard

We’re going to start at the very beginning. That means making sure you have the right clothing, equipment and protective snowboarding gear. While we recommend maybe borrowing a snowboard while you’re learning just in case it doesn’t work out for you, you ‘ll need to find out what size of snowboard you need.  

For warmth, its the three-layer rule, with a base wicking layer, under a thermal layer for warmth all covered by a windproof, water-resistant snowboarding jacket and pants. For protective gear, gloves, snowboarding boots, a helmet and goggles are the basics.

6 Tips to Learn Snowboarding for Beginners

Some of these are common sense, some you might never have thought of. Either way, they will help you get on the slopes sooner.

  1. Take Lessons – Yes, you might be able to teach yourself. But the time and frustration you save with proper lessons is well worth the cost.
  2. Find Out if You’re Regular or Goofy Footed – It will tell you which is your front foot on the board and which is the back foot. Left foot forward is regular footed and right foot forward is goofy footed.
  3. Learn the Right Way to Fall – It’s going to happen a lot. Learning to fall properly, with your hands and arms in close to your body, will reduce your chance of injury.
  4. Learn to Skate on the Board – When you’re on a flat, and you want to get somewhere, like to the lift, take your back foot from the binding and push yourself along like you’re on a skateboard.
  5. Look in the Direction You Want to Go – Oddly enough, we tend to go where we are looking, even when driving a car. On the snowboard, unless you are looking where you want to go, you might never get there.
  6. Get Edge Control – The natural “edge” is the one under your heel. You will start to learn to snowboard with your heel edge dug into the snow and your body facing down the hill. As you slowly take the weight off the heel and transfer it more towards the toe edge, it will release the board and you will start moving.

If you enjoyed this post, check out our recent article about why Blue Mountain is called Blue Mountain.

9 Items for Your “What to Take Hiking” List

Blog
Stay at Blue Mountain shares a guide on what to take hiking

Of course, you can hike year-round, but many of us are fair-weather hikers. And summer’s almost here! But avid and occasional hikers alike have a similar problem before their first outing every year. What do I take hiking?

Part of the problem is that the climate in Southern Ontario gives us a bit of everything, at almost any time of year. That means preparing for even a short day hike can be difficult

Take These Things on Every Hike

First, there’s a difference between day hikes and multi-day hiking and camping. The list below includes things you should carry with you on just about every trek, regardless of its length or duration, for your safety and enjoyment.

Some of these items might seem like a little much if you just want to hit the trail for a day hike, or when in familiar areas. But even on the shortest jaunt, if something happens, you’re not likely to have help nearby. And the peace of mind that comes from knowing you’re ready for anything makes it all that much more enjoyable.

  1. The Tools of Navigation – You should always have a compass and topographic map. A map and compass will never run out of power like a GPS unit might.
  2. Extra Clothing – Remember, this is Southern Ontario. Even if you’re just using a t-shirt, you should have an insulating and outer (waterproof) layer in your backpack.
  3. Sun Protection – Sunscreen, lip balm, wide-brim hat and sunglasses are must-haves and long-sleeve shirts and pants are should haves.
  4. Lighting – Not just your cell phone either. You need that for emergency calls. Carry LED flashlights or headlamps with spare batteries.
  5. A First Aid Kit – Make it as large as needed for the number of people on the journey, it’s duration, and the risk levels you anticipate.
  6. Food & Water – Have enough energy bars and dry food to last you until tomorrow and at least two litres of water. A way to treat water, either tablets or a portable purifier, is a nice thing to have.
  7. Tools – A solid multi-tool with scissors, knife, plastic ties, screwdriver, saw and pliers is the bare minimum. Carry larger yet portable versions of all of those if at all possible, and also duct tape and a shovel.
  8. Fire Starter – In a plastic bag, pack a lighter, waterproof matches and a fire-starter product.
  9. Emergency Shelter – You’ll have a tent and sleeping bag if you’re on an overnight trip. But even on a day trip, you should carry an emergency blanket and large orange plastic bag, which will not only keep you dry, but it’ll be easy to see in a search and rescue situation.

Hiking is one of the many things to do in Blue Mountain, summer or winter. There are many trails on the Mountain, below it and more than a few along the face of it.

If you liked this post, check out our recent article about how to pack a hiking backpack.

A Self-Guided Pub Crawl Through Blue Mountain Village

Blog

The best part of enjoying a self-guided pub crawl through Blue Mountain Village is that you won’t need any high-powered GPS apps to find where you’re going. It’s amazing the different flavours in food and refreshments that you can find in a relatively small area.

Stops on a Blue Mountain Village Pub Crawl

While the pubs aren’t very far apart, The Village is a great place for a pub crawl because of everything there is to see and do between stops. And that can only make your crawl longer and more enjoyable.

  1. MJ Byrne’s Irish Pub
    MJ Byrnes Irish pub
    What better place to start or finish a pub crawl that an authentic Irish pub? Located in the heart of the Village, MJ Byrne’s is close to hotel accommodations and Blue Mountain rental chalets. Winter or summer, you’ll find a warm, welcoming atmosphere, 28 draft beers from around the world (including Guinness, of course) and live music every night.If you’re hungry, peruse the bilingual Gaelic/English menu to find traditional Irish favourites like steak and mushroom pie or local favourites like poutine!
  2. Kaytoo Restaurant & Bar
    Kaytoo Restaurant & Bar
    Another great part of a Bluemojtina Pub crawl is the variety of vibe’s you’ll get at each stop. The Kaytoo prides itself to adding some genuine Canadian flair to your meals and nightlife in The Village. If you’re wondering what that means, think hockey on the screen, patio lanterns, great beer and tasty burgers.If you’re looking for something “oh so Canadian” on the menu, try the Stampeder burger, brushed with Collingwood whiskey maple bbq sauce.
  3. The Bullwheel Pub
    The Bullwheel Pub
    Getting to The Bullwheel will take you to the south end of the Mountain, but it’s still an easy walking distance. If you’re wondering where the name came from, a bullwheel is used to turn the rope that traditionally pulled chairlifts. That connection to skiing belies the Bullwheel’s perfect slopeside location.Get your taste buds ready for some perfect apres-ski fare, from deep-fried pickles to a Montreal-steak-spiced bison burger.
  4. The Northwinds Brewpub
    The Northwinds Brewpub
    One of the newer additions to a Blue Mountian Village Pub Crawl, the Northwinds delivers unique, locally brewed craft beers and ales, and delicious dishes on a menu developed by Head Chef Travis Barron. From comfort food like mac and cheese sticks to a house-smoked pulled pork patty melt entree, the food choices are as eclectic as your refreshment options.

If you enjoyed this post, check out our recent article about what to do in Blue Mountain during March Break.

Hiking Near Toronto: The Best Trails In Blue Mountain

Blog
Wondering where the best hiking trails are in Blue Mountain? Today's blog post by Stay at Blue Mountain lists some choices for you.

If you’re looking for some great hiking near Toronto, you’re only an hour and a half away from Blue Mountain’s hiking trails and series of multi-use trails. If you’ve never hiked anywhere along the Niagara Escarpment, get ready for a whole new level of challenge and enjoyment.

Blue Mountain’s Hiking Trails

Starting with four dedicated trails for hiking that you can easily access from Activity Central in The Village, not far from Blue Mountain chalets for rent, or from Scenic Caves Rd. and Swiss Meadows Blvd at the top of the Mountain, the area’s trails range from “Easy” to “Advanced”. 

The four dedicated hiking trails include:

  • Memory Lane – An easy .5 kilometre route through the forest near the top of the Mountain.
  • Straight-Up – If you’re looking for a great workout in the shortest possible time and route, Straight Up is an intermediate hike that leads, like the name says, straight up the Mountain for just short of 1 km.
  • Cascade – Similar to Straight Up, you can go from the foot of the Mountain to the peak through 1.2 kms of mostly forested areas on Cascade, which is rated as an intermediate trail.
  • Village Way – At 1.3 kms, the intermediate Village Way is the longest of them all as it meanders from Activity Central up the Mountain to meet up with two mixed-use, hiking and biking trails.

Other hiking options at Blue Mountain include:

  • Columbia Guided Hikes – Join a group of like-minded hikers and learn more about your surroundings on these guided tours that leave from Columbia Sports in The Village every morning at 10:30 am during the months of July & August.
  • Mixed-Use Hike & Bike trails – There are eight mixed-use trails ranging from the easy .6 km Pathway to Village, to the advanced 2.5 km Cagey.

If you enjoyed this article, check out our recent post on what to do during March Break in Blue Mountain.

What Size Snowboard Do I Need?

Blog
If you are wondering about the size of snowboard you need, check out stay at blue mountain

If you’re thinking about getting into snowboarding, it is a fun, exhilarating and very social activity. And choosing a snowboard that’s the right size is crucial if you want to enjoy all that snowboarding offers.

But answering the question of “what size snowboard do I need?” does not always have a direct answer. The traditional starting point for choosing board length is to find one that comes up to your chin when you are standing and it is on end. You can’t go wrong using that rule of thumb. But many other factors can affect the perfect snowboard length for you.

How to Choose the Right-Sized Snowboard

The following are among the factors that can affect the length of snowboard you choose.

  1. Your Body Weight & Height – While the “chin” rule generally works, your body type can mean the right board for you may need to be longer or shorter. Generally, higher body weights or heights require longer boards. But what if you have a lanky or stocky build? Use a snowboard size chart for both height and weight. Find the size that’s right for your weight and the one that’s right for your height. The difference between the two is the size range of board you should use.  
  2. Snowboard Width – Depending on your boot size, you may need a wider or narrower board. The snowboard boot’s length should closely match the width of the board at its narrowest point. 
  3. Your Level of Ability – Beginners should start with standard snowboard widths and lengths. Not only do they work well for more people, they offer you a “baseline” for choosing different lengths as your abilities and personal preferences change.

    As you progress, you’ll prefer different types of riding. If you like it all, all-mountain snowboards are the way to go. Mountain boards are among the most popular due to their versatility. If you like hits on every box, a freestyle board on the lower end of your size range is good. And if you like going off-trail, a longer free ride board is the ticket.

As you gain more skill and experience, you will find other elements that affect snowboard size, including snow conditions and higher speeds. If you’re ever wondering about what to do in Blue Mountain, snowboarding is always a great choice.  

If you like this post, check out our recent article on why Blue Mountain is called Blue Mountain.

What to Do During March Break in Blue Mountain

Blog
Here are some ideas on what to do during a Blue Mountain March break | Stay at Blue Mountain

In less time it takes to wait for a flight, and for a lot less than the cost of a plane ticket, you could be in Blue Mountain for March Break. And you’ll find just as many things to do there as anywhere in the world!

Happenings in Blue Mountain During March Break

If you’re wondering what to do in Blue Mountain during March break, get ready for days filled with adventure and fun for all ages on and off the slopes. March Break is family time at Blue Mountain with daily activities, live music, interactive performances, fireworks and more!

Here’s just some of what you can look forward to.

  1. Every Day in Blue Mountain Village – If you’ve never snowshoed, you don’t know what you’re missing. Every day at 10:30am during March Break, you can enjoy the Columbia Guided Snowshoe Tour. You don’t even need to your own snowshoes because rentals are available at the South Base Lodge.

    Taffy on Snow – Every afternoon from noon to 4:00 pm, you can indulge your sweet tooth in the coolest way possible. Watch hot taffy instantly cool on snow, and then enjoy the results.

  2. Other Events in the Village – Each day brings its own list of fun and exciting “things to do” in the Village.
    • The Village Scavenger Hunt – Spend your day finding the items on your list throughout the Village.
    • Interactive Groove Dancing – Get your groove back, and get in shape, at the Coca-Cola Village Stage with this popular event.
    • The Amazing Village Race – Find the clues and compete with your friends, neighbours and other visitors to win the race around the Village.
    • Fireworks! – Enjoy a dazzling fireworks display in the crisp evening air.

  3. March Break Freestyle Camp – If you’re a freestyle skier or snowboarder, you can enjoy March Break on the pipes and slopes honing your skills. Coaches help you master jumping, rails and slope-style skiing.

If you enjoyed this post, check out our recent article on what to wear while skiing and snowboarding.

Planning an upcoming stay in the Village of Blue Mountain? Make sure to explore our luxury chalet rentals, great for large groups and families.

What to Wear for Cross-Country Skiing

Blog
What to wear for cross country skiing | Stay at Blue Mountain

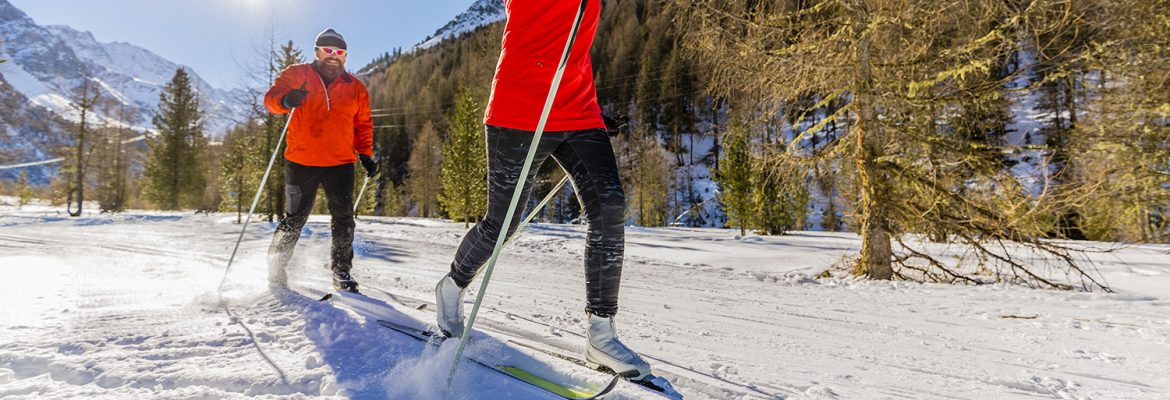
It might be the best outdoor aerobic activity that’s exclusive to winter. If you’re ever wondering what to do in Blue Mountain in winter, it’s also a great way to explore the area in ways that you can’t do at any other time of year. But if you don’t know what to wear for cross-country skiing, you might not fully enjoy all it has to offer.

Dressing for Cross-Country Skiing Versus Other Winter Activities

Also known as Nordic skiing, cross-country skiing requires a different approach to the clothing you wear versus other outdoor activities in the winter, like downhill skiing and snowmobiling. The vigorous activity means you need clothing that not only keeps you warm and dry but also doesn’t restrict your movement too much.

Here’s What to Wear When Cross-Country Skiing

The combination of different levels of exertion and the variety of weather conditions in which you might cross-country ski means you need to pay close attention to what you wear.

  1. Dress in Layers – The effort needed to cross-country ski can generate a lot of body heat. That means it’s crucial to dress in lighter layers of clothing instead of one or two heavy layers. Layering also lets you adjust your clothing as needed to remove or add layers as you ski.

    The standard three-layer approach is a good place to begin. Wear a base layer, the one next to your body, that’s relatively tight fitting and moisture-wicking. The second layer is your insulating layer for warmth. A zip-up thermal fleece is a good second layer. The third layer should be a durable, water-repellent outer shell that is breathable. 
  2. For Your Head, Hands and Feet – Layering applies to other parts of your clothing too. To avoid cold hands, you can wear liner gloves covered by insulated ski gloves. On your feet, wool or synthetic socks will help keep them warm and dry and ski boots will work as the outer layer. On your head, you can use a light cap on warmer days and a wool or fleece thermal beanie in colder conditions. 
  3. A Light Back Pack – It’s often difficult to predict how weather conditions and your levels of exertion will affect your body temperature and clothing requirements. If it’s a sunny, warm day, you’ll know to use lighter layers. But if you’re not sure, consider using a light backpack to carry extra layers that you might need or to store layers that you shed.

If you liked this post, check out our last article on why Blue Mountain is such a popular ski destination.

What to Wear Skiing & Snowboarding

Blog
Learn what to wear skiing in today's article by Stay at Blue Mountain

Skiing and/or snowboarding are probably at the top of every list of what to do in Blue Mountain. It’s always nice to see skiers and snowboards from around the world enjoying everything the area has to offer. What isn’t so nice is to see people who aren’t dressed properly to enjoy themselves to the fullest.

The Two Basic Guidelines of Dressing for the Slopes

Keep the following guidelines in mind when you’re getting ready to enjoy the slopes.

  • Stay Warm & Dry – It might sound obvious, but you should dress to stay warm while being outside for an extended period and dry even when you sweat, or fall in the snow!
  • Avoid Cotton – It’s tempting to wear your favourite cotton jeans and sweatshirt, but they can trap moisture and make you cold

What to Wear on the Ski Hills and Snowboard Runs

Use the following tips to make sure you stay comfortable all day long.  

    1. Use the 3-Layer Rule for Upper and Lower Body – It’s a big mistake to under-dress or over-dress for winter activities. Use the following three layers to avoid both.
      • Base Layer – This is the layer next to your skin and it should stay dry. Synthetic thermal long underwear wicks away sweat and moisture.
      • Warmth Layer – Like the name implies, this mid layer should help keep you warm while minimizing moisture. Thermal polyester and wool both offer warmth and dryness.
      • Outer Shell – The main goal of the outer layer is to keep out wind, rain and snow while being breathable to help evaporate sweat.
  1. Keep Your Head Warm & Protected – First, we recommend you always wear a helmet. To stay warm, thermal beanies are becoming increasingly popular because of how easily they fit under your helmet.
  2. Protect Your Eyes – Sunglasses can help. But goggles are best for protecting your eyes from snow, cold and glare.
  3. Have Warm & Dry Hands – The best snowboard and ski gloves or mittens provide all-in-one ‘3-layer’ protection to keep your hands dry and warm.
  4. Use the Right Footwear – Snowboard and ski boots are designed to keep your feet warm. So all you need to do is wear single-layers of wool or acrylic socks to keep your feet dry.

If you liked this post, check out our last article on five things you might not have considered for your company retreat.